
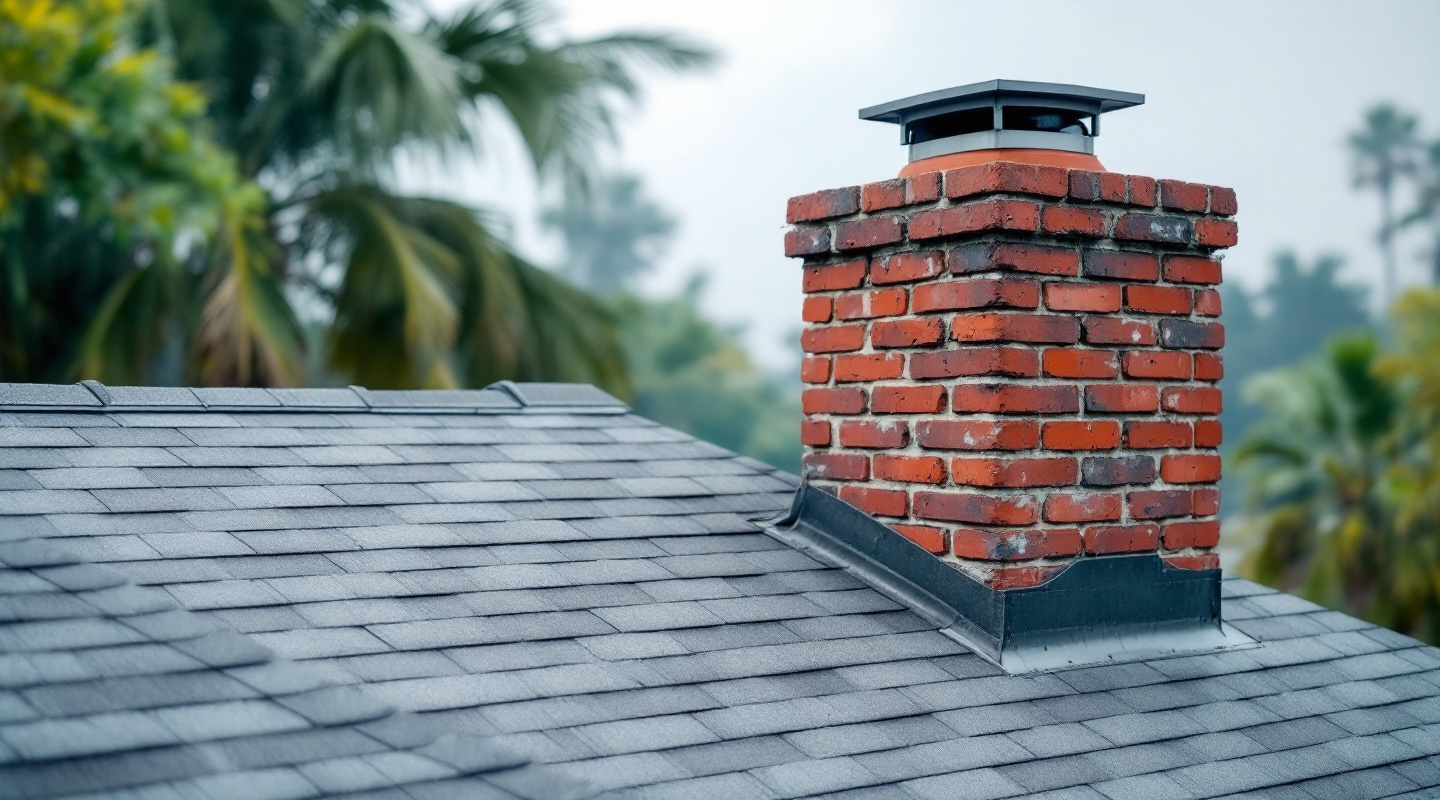
The One Thing That Turns a Solid Roof Into a Leaking One
A roof can be covered with perfectly installed shingles and still develop a serious leak within a few years. The culprit, nine times out of ten, isn’t the shingles — it’s the flashing. And in the South Carolina Lowcountry, where the air holds humidity like a sponge and summer storms can push water sideways, flashing failure isn’t just common. It’s nearly inevitable if the installation was done wrong.
Flashing is the thin metal material — typically galvanized steel, aluminum, or copper — installed at every joint, transition, and penetration on your roof. Valleys, chimneys, skylights, vent pipes, dormers, walls where the roof meets a vertical surface: every one of those spots requires flashing to redirect water away from the underlying structure. Skip it, install it poorly, or use the wrong material, and you’ve created a direct path for water into your home’s framing, insulation, and ceilings.
If you’ve already noticed staining on interior ceilings or walls, you’re probably searching for roof leak repair near me — and you’re right to act fast. But understanding why the leak happened in the first place is what separates a real fix from a patch job that fails again in two years.
Why the Lowcountry Is Especially Unforgiving on Flashing
Humidity Accelerates Everything
The Lowcountry’s humidity doesn’t just feel oppressive — it actively degrades roofing materials. Galvanized steel flashing, which is still the most commonly installed type in the region, has a protective zinc coating that breaks down over time. In high-humidity coastal environments, that process moves significantly faster than in drier inland climates. Once the zinc layer is compromised, rust forms at the edges and seams, and those are exactly the spots where water finds its way in.
Aluminum flashing holds up better against rust, but it has its own vulnerability in the Lowcountry: galvanic corrosion. When aluminum contacts certain metals — particularly copper or steel fasteners — moisture acts as a conductor and creates an electrochemical reaction that eats through the material. It’s the kind of failure that takes a few years to show up visually but causes serious damage in the meantime.
Wind-Driven Rain Changes the Equation Entirely
Standard roofing design assumes that water falls vertically and runs downhill. That’s not what happens during a Lowcountry storm. Tropical systems and fast-moving squalls drive rain nearly horizontally, forcing water under shingles and behind flashing from directions that gravity-based installation never anticipated.
Step flashing — the L-shaped metal pieces installed along walls and chimneys — is designed with a specific overlap to handle normal rainfall. But when rain is driving in at 40 or 50 mph, that overlap isn’t always enough without a secondary sealant layer behind it. Contractors who don’t work regularly in coastal South Carolina often install flashing exactly as they would in, say, the Piedmont region — and it works fine for years until a real storm hits.
Thermal Cycling Takes Its Own Toll
Lowcountry summers push roof surface temperatures well above 150°F. Winter nights can drop to near freezing. That cycle of expansion and contraction, repeated hundreds of times a year, stresses every sealed joint on the roof. Sealants applied over flashing — which should supplement proper mechanical installation, not replace it — crack and pull away from the metal after repeated cycling. Once that seal breaks, water follows the path of least resistance straight into your home.
Where Flashing Most Often Fails on Lowcountry Homes
Chimney Flashing: The Most Complex, Most Frequently Botched
Chimney flashing involves multiple components working together: base flashing at the bottom, step flashing along the sides, counter flashing embedded in the mortar joints, and saddle or cricket flashing at the high side to divert water around the chimney mass. Every one of those components has to be installed correctly for the system to hold.
The most common failure point we see is counter flashing that was surface-applied with roofing cement rather than properly embedded into the mortar. That cement lasts three to five years in this climate before it shrinks, cracks, and separates. What looks like a sealed chimney from the ground is actively leaking every time it rains hard. A proper repair means removing old sealant, cutting a reglet into the mortar joint, and embedding the flashing — not just gluing it to the surface.
Valley Flashing: Where Water Concentrates
Roof valleys are natural collection points — every drop of rain that falls on two adjacent roof planes funnels through the valley. That concentration of water means valley flashing takes more abuse than almost any other part of the roof. Open metal valleys, when installed correctly with a minimum 16-inch wide metal strip and properly lapped seams, can last 20 years or more. But valleys are also frequently cut short at the eaves, improperly fastened, or installed with metal that’s too thin to handle the volume of water moving through during heavy rain.
Woven or closed-cut shingle valleys — where shingles overlap the valley instead of metal — are popular because they look cleaner. But they’re only as watertight as the installation quality, and in wind-driven rain conditions, open metal valleys consistently outperform shingle-only valleys for leak resistance. That’s a trade-off worth understanding before your next roof repair.
Skylight and Vent Pipe Flashing
Skylights are installed with integrated flashing kits from the manufacturer — but those kits require precise installation to work correctly. A common shortcut is to skip the step flashing and rely entirely on sealant around the skylight frame perimeter. That approach fails within a few years, sometimes faster in full-sun Lowcountry exposure. Properly installed skylight flashing uses the same step-and-counter approach as chimney work, with the manufacturer kit providing the form and the installer providing the technique.
Vent pipe boots — the rubber or metal collars that seal around plumbing vents — are frequently overlooked because they’re small and easy to miss on a roof inspection. Rubber boots degrade in UV exposure, typically cracking and pulling away from the pipe within 10 to 15 years. On a 20-year-old roof, there’s a good chance every rubber vent boot needs replacement, even if the shingles still look fine from the street.
Warning Signs You Shouldn’t Ignore
Catching flashing failure early can mean the difference between a $400 repair and a $6,000 decking replacement. From the ground, look for dark streaking on the exterior wall near chimneys, lifted or missing metal at roof edges, and any visible rust staining on flashing material. Inside, water stains on ceilings that appear after heavy rain — especially near chimneys, skylights, or exterior walls — almost always trace back to flashing, not shingles.
The tricky part: flashing leaks are rarely directly above the water stain. Water infiltrates at the breach, travels along the sheathing or rafters, and drips at a low point that may be several feet away. That’s why surface-level diagnosis — poking around the ceiling stain — misses the actual source. A proper inspection follows the water pathway back to the entry point.
If a storm caused sudden, obvious damage, that’s a clear case for emergency roof repair before the next rain event. But gradual flashing failures often go unnoticed until there’s visible interior damage — which is exactly when most homeowners start searching for roof leak repair near me.
What Proper Flashing Installation Actually Requires
Material Selection Matters More Than Most People Realize
Copper flashing is the gold standard for longevity — properly installed copper can last 50 years or more, and it’s especially well-suited to coastal environments where corrosion resistance matters most. The trade-off is cost: copper flashing runs significantly more than galvanized steel. For a chimney reflash using copper, expect to invest in the $800–$1,500 range depending on chimney size, compared to $300–$600 for galvanized. For homeowners planning to stay in their house long-term, copper is worth the premium.
Galvanized steel is a reasonable choice when budget is the primary constraint, but don’t let a contractor use lightweight 26-gauge material in valley applications. 24-gauge is the appropriate minimum for high-water-volume areas. That two-gauge difference doesn’t sound significant until you watch thin flashing buckle and separate after a few seasons of thermal cycling.
Integration, Not Just Attachment
Flashing has to integrate with the roofing system, not just be fastened on top of it. Step flashing, for example, should be woven with each course of shingles — one L-shaped piece per shingle course, each overlapping the piece below by at least two inches. A contractor who installs step flashing as a single continuous strip is taking a shortcut that will fail. Experienced roofing contractors near me know the difference, and it shows in the quality of the work.
For commercial properties dealing with flat or low-slope roof transitions, flashing complexity increases significantly. If you manage a commercial building in the Lowcountry, the same principles apply — see our breakdown of Commercial Roof Replacement: When to Repair vs Replace for guidance on when flashing repairs alone are enough versus when a full system replacement makes more financial sense.
How to Vet a Contractor for Flashing Work Specifically
Questions That Reveal Real Experience
Ask any prospective contractor two specific questions: what flashing material do they recommend for your roof type and why, and how do they handle counter flashing on chimneys — surface-applied or reglet-cut? A contractor who recommends surface sealant over mortar embedding, or who can’t articulate the difference, hasn’t done enough chimney work to trust with yours.
South Carolina requires roofing contractors to hold a state residential specialty license. Verify licensure through the South Carolina Contractor’s Licensing Board before signing anything. But licensure is a floor, not a ceiling — years of regional experience in Lowcountry conditions is what separates an adequate job from one that holds up through hurricane season. If you’re comparing roofing companies near me, ask specifically how many coastal South Carolina roofs they’ve worked on in the past two years.
For metal roofing systems, flashing details are even more technical. What to Look for in a Reliable Metal Roof Repair Company covers the credential and experience markers worth checking before committing to any contractor for metal roofing work.
Hixons Roofing has spent years serving homeowners throughout the South Carolina Lowcountry, and in that time we’ve diagnosed and repaired hundreds of flashing failures — many of them on roofs that were only five or six years old. The pattern is consistent: shortcuts taken during original roofing installation show up as leaks the first time a serious storm comes through. Getting it right the first time is always cheaper than fixing it twice. You can also review what to expect from a quality repair experience in this guide to roof repair considerations before your next service call.
Flashing failure is predictable, preventable, and — when caught early — very fixable. Don’t let a small leak become a structural problem while you wait for it to get worse on its own.
Written by the Hixons Roofing team — licensed roofing specialists with extensive experience serving South Carolina Lowcountry homeowners through storm seasons, coastal humidity, and everything in between.
To get a straight assessment of your roof’s flashing and schedule a professional inspection, contact Hixons Roofing at hixonsroofing.com.